
 By
By 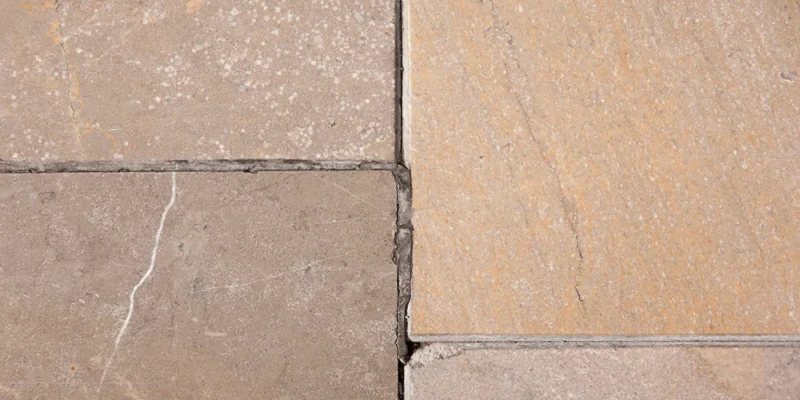
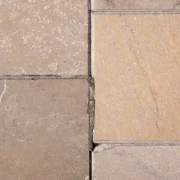
Few things disrupt the sleek, elegant look of a freshly tiled floor like inconsistent tile joints. You step into a newly renovated bathroom or kitchen expecting straight, uniform grids, only to spot crooked, wavy, or varying gaps between the tiles. Irregular spacing ruins the visual symmetry of your space, traps dirt unevenly, and often indicates underlying installation errors.
Whether you notice narrow gaps in one corner and wide crevices in another, understanding the root causes helps you take proper corrective action. Maintaining a neat, uniform grout line across your tiled surfaces requires a blend of quality materials and precise technique.
Unmasking the Main Culprits Behind Crooked Tile Joints
Achieving perfectly straight grid lines requires meticulous craftsmanship and quality materials. When tile joints look crooked or uneven, several common mistakes during the preparation and laying phases usually cause the problem.
| Main Culprit | Description & Impact |
| Substrate Imperfections | Unlevel concrete subfloors or uneven wall backing force tiles to sit at slightly different heights and angles, throwing off the straight alignment of each adjoining gap. |
| Skipping Tile Spacers | Installers who rely on visual estimation rather than plastic tile spacers inevitably produce inconsistent gap widths across larger floor spans. |
| Tile Size Variations | Natural stone and non-rectified ceramic tiles often feature subtle manufacturing variances in size and edge sharpness, making uniform spacing difficult without careful sorting. |
| Inconsistent Trowel Pressure | Applying tile adhesive unevenly creates dips and raised edges, which forces the tile joint gap to warp as the adhesive sets. |
Identifying these installation missteps early allows you to address the root problem before committing to permanent repairs.
Evaluating the Impact of Tropical Humidity on Tile Installations
Environmental conditions play a massive role in how tiling materials cure and set. High ambient humidity and warm temperatures alter the working time of adhesives and grouting compounds.
| Environmental Factor | Installation Impact | Resulting Grout Defect |
| High Ambient Humidity | Retards adhesive drying time | Causes tiles to shift or slump before setting |
| Rapid Surface Evaporation | Weakens cement bonding strength | Leads to cracked, crumbling, or uneven joint fill |
| Thermal Expansion | Expands tile bodies in warm rooms | Squeezes joint lines and causes lippage or buckling |
Working with standard cement-based grout in Singapore demands careful humidity management during application. Rapid moisture loss or excess dampness during curing causes the compound to sink unevenly, leaving shallow dips along the joint lines.
Practical Steps to Correct Existing Joint Irregularities
Fixing uneven gaps depends on whether the issue stems from shallow joint depth or actual tile misalignment. You can resolve surface-level flaws with targeted repairs, while severe alignment errors require professional intervention.
| Repair Strategy | Best Suited For | Corrective Procedure |
| Joint Regrouting | Shallow, sunken, or cracked joint fill | Rake out defective material and pack fresh compound flush with tile edges |
| Tile Relaying | Physically misaligned or crooked tiles | Remove affected tiles, level the subfloor adhesive, and reset using spacers |
| Color Sealing | Visual line illusions caused by staining | Apply a uniform colour sealant to mask slight width variations visually |
For minor height or depth variations, raking out shallow filler material and applying a fresh, non-shrink compound restores a smooth, level surface. Choosing a high-performance epoxy compound prevents future shrinking and ensures each grout line remains straight and flush.
Partnering with Skilled Professionals for Seamless Results
Attempting extensive DIY repairs on crooked tile joints often worsens the problem, leading to chipped tile edges and messy finishes. Professional technicians possess specialised tools, such as oscillating rake blades and precision levelling clips, to fix joint errors cleanly.
When repairing or replacing old filler material, hiring experts experienced with applying grout in Singapore guarantees a durable, moisture-resistant finish tailored to local tropical conditions. Skilled specialists ensure exact colour matching, clean joint profiles, and long-lasting structural integrity across all your tiled surfaces.
Frequently Asked Questions
Can I fix uneven tile joints without removing the existing tiles?
Yes, if the tiles sit straight but the filler material looks shallow or uneven, a technician can rake out the top layer of old material and apply a fresh, flush layer.
Why does my fresh tile joint shrink and sink after drying?
Mixing cement compounds with excess water causes rapid evaporation during curing, which shrinks the material and creates hollow, uneven dips along the joint.
How do levelling clips prevent crooked tile joints during installation?
Levelling clips lock adjacent tiles at identical heights while the adhesive dries, preventing tiles from shifting, slumping, or creating uneven joint edges.
Restoring Your Tiled Perfection
Uneven tile joints disrupt the beauty of your home, but identifying the causes allows you to correct them effectively. Whether substrate flaws, skipped spacers, or moisture issues caused the distortion, targeted regrouting or selective tile resetting restores a clean, symmetrical layout. Investing in quality materials and professional application ensures your tiled floors remain smooth, durable, and visually stunning for years to come.
Contact Grout ProTech to eliminate uneven tile joints and upgrade your home today!







Comments